Sharepoint Tutorial: Use a Workflow that integrates with SharePoint
TACTIC has the ability to handle everything from highly complex workflows to simple, parallel workflows. In this tutorial, you will work with a predefined workflow to store document assets into a Sharepoint document repository and retrieve the documents for subsequent process steps. The goal is to demonstrate how TACTIC can manage any kind of document required for your business workflows and maintain these documents within your company Sharepoint repository.
Southpaw typically recommends our customers start with simple workflows and build out to more complex workflows over time. Of course, our Services Team is here to support all of these efforts.
In this tutorial, TACTIC integration with SharePoint is demonstrated using work-in-progress (WIP) assets from a pre-defined SharePoint folder that are pulled into the TACTIC job assets folder. At job completion, the assets are stored in the TACTIC asset library (master).
Business Use Case
A large bank has a customer onboarding process involving a number of required documents. A customer service representative (CSR) is tasked with managing the onboarding process for a new customer. The onboarding process includes creating a Customer Information File (CIF) entry, provisioning a chequing account and an ATM/debit card.
In this case, the CSR is notified to retrieve the onboarding documents from a pre-defined SharePoint folder. The source documents include a set PDF forms and images of customer identification, etc. The bank has a policy to store all important documents in a single centralized repository. The bank uses TACTIC as this repository. As the onboarding process moves forward, documents can be retrieved from TACTIC; reviewed and updated as necessary prior to approval.
To complete this task, the CSR will need to manage multiple files to complete the onboarding process. Steps will require approval from collaborators and managers.
When the onboarding process is complete, a document set will be available in the TACTIC master asset library for reference.
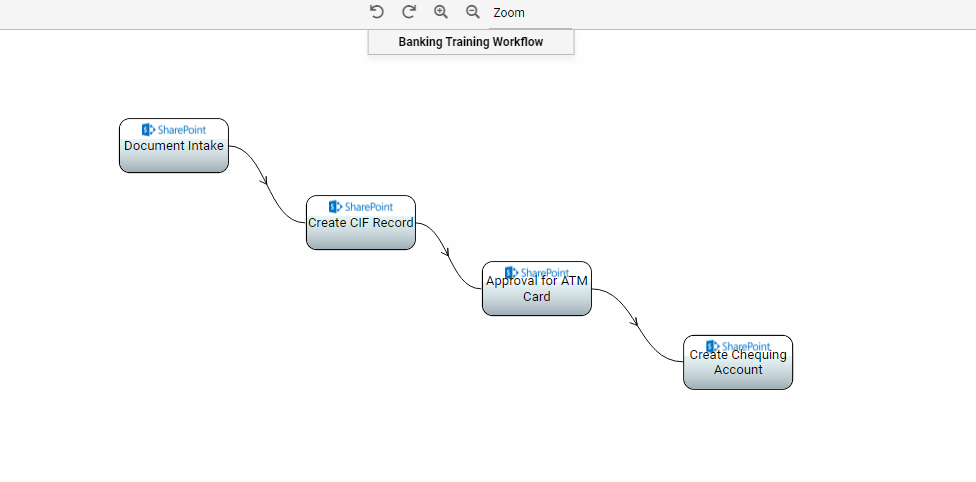
Tutorial Workflow
Workflow for customer onboarding tutorial in TACTIC:
Step 1:
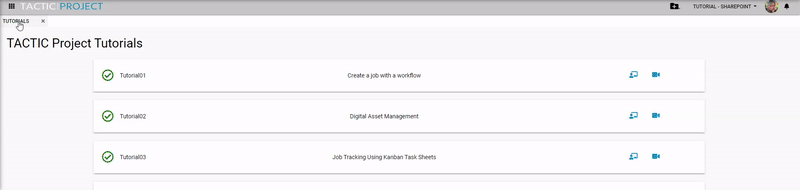
Gather several documents to act as onboarding documents, these should include Word, PDF and jpg image files. Log into TACTIC, then navigate to the top left grid icon and select "Tutorials" from the dropdown list. Load the SharePoint Tutorial from the list of available tutorials.

Step 2:
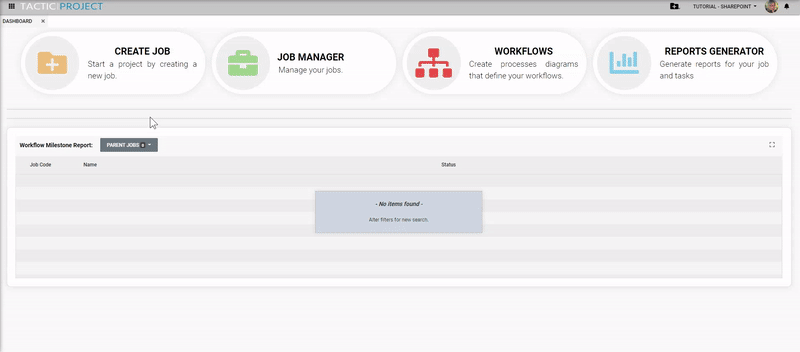
Navigate to the TACTIC Dashboard through the top left grid icon.
Step 3:
A 'Create New Job' window will appear. Select Customer Onboarding from the Job Types. Add a Title to the job, for example: 'Customer onboarding for J. Smith'. Select the workflow from the dropdown called “Customer Onboarding”. Select any future date if you'd like but it's not necessary. Then press the 'Create New Customer Onboarding' button.
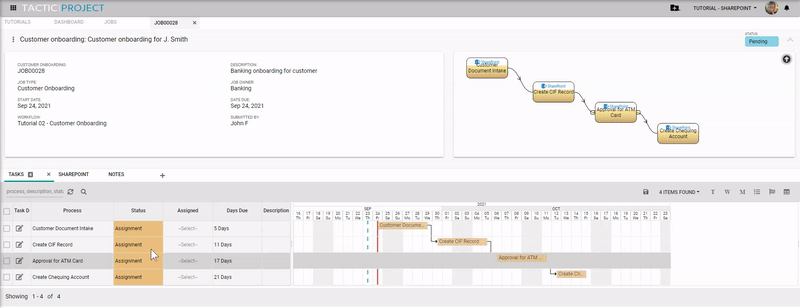
Step 4:
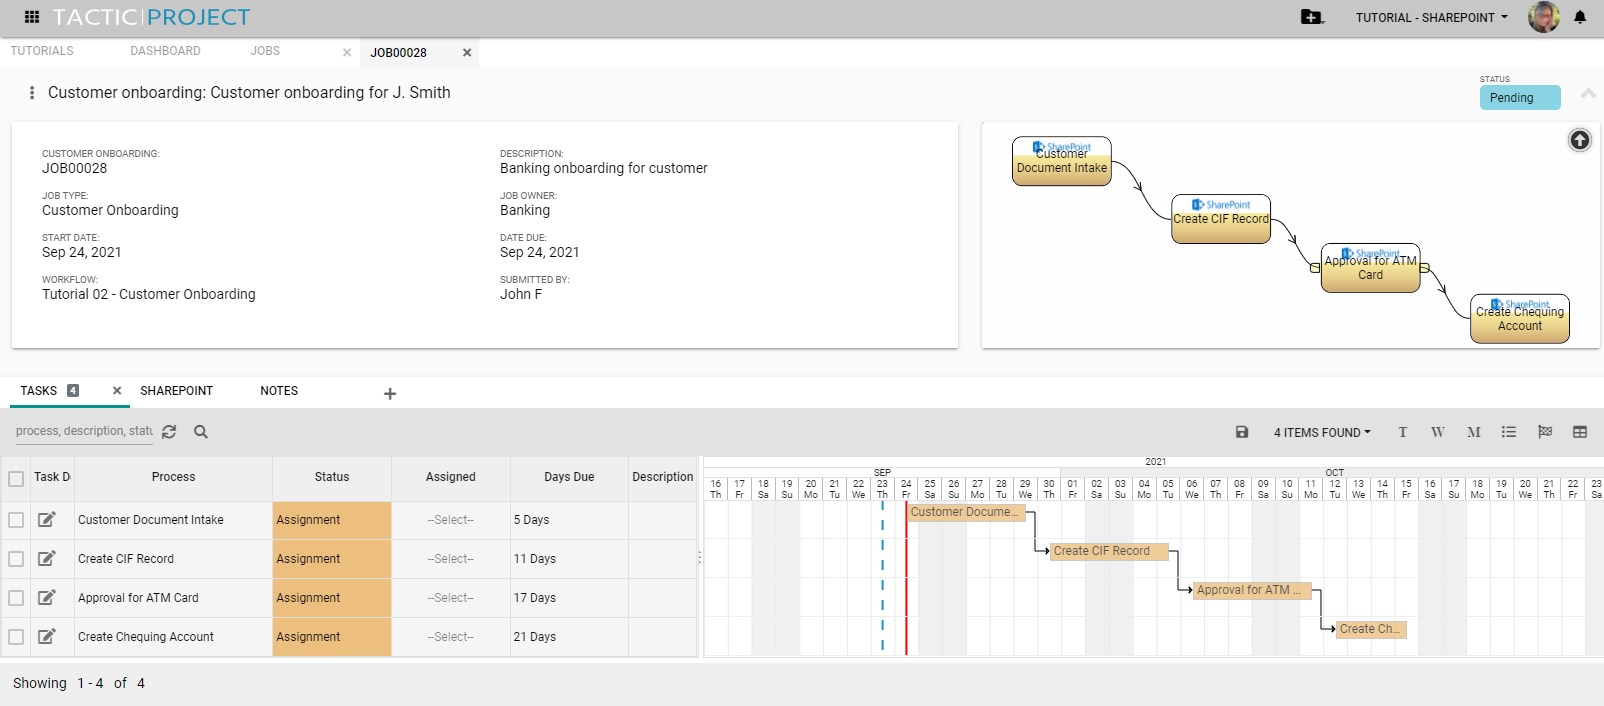
Once the job has been created, a new view will appear that contains information about the job (project) you have just created, such as timelines, users, and task statuses. This view is used by the Project Manager to mange schedules, deadlines and communicate with their team.
Step 5:
Set the first task (Customer Document Intake) in the list view to "Pending" and assign it to yourself (your TACTIC login assigned name) using the dropdown under the "Assigned" column. Then SAVE this change by pressing SAVE icon on the middle right of the screen.
Step 6:
Navigate to the grid icon on the upper left and select "My Tasks" from the dropdown. The Pending "Customer Document Intake" task will be located in the panel on the left. Ensure it is selected. Navigate to the SHAREPOINT tab and select the UPLOAD button. An Upload Files window will appear. Upload the assets you gathered in Step one using the ADD FILES button, when finished press the UPLOAD FILES button. Once the download is complete, press the "COMPLETE TASK" button on the upper right. The files will now be stored and accessible in the TACTIC job.

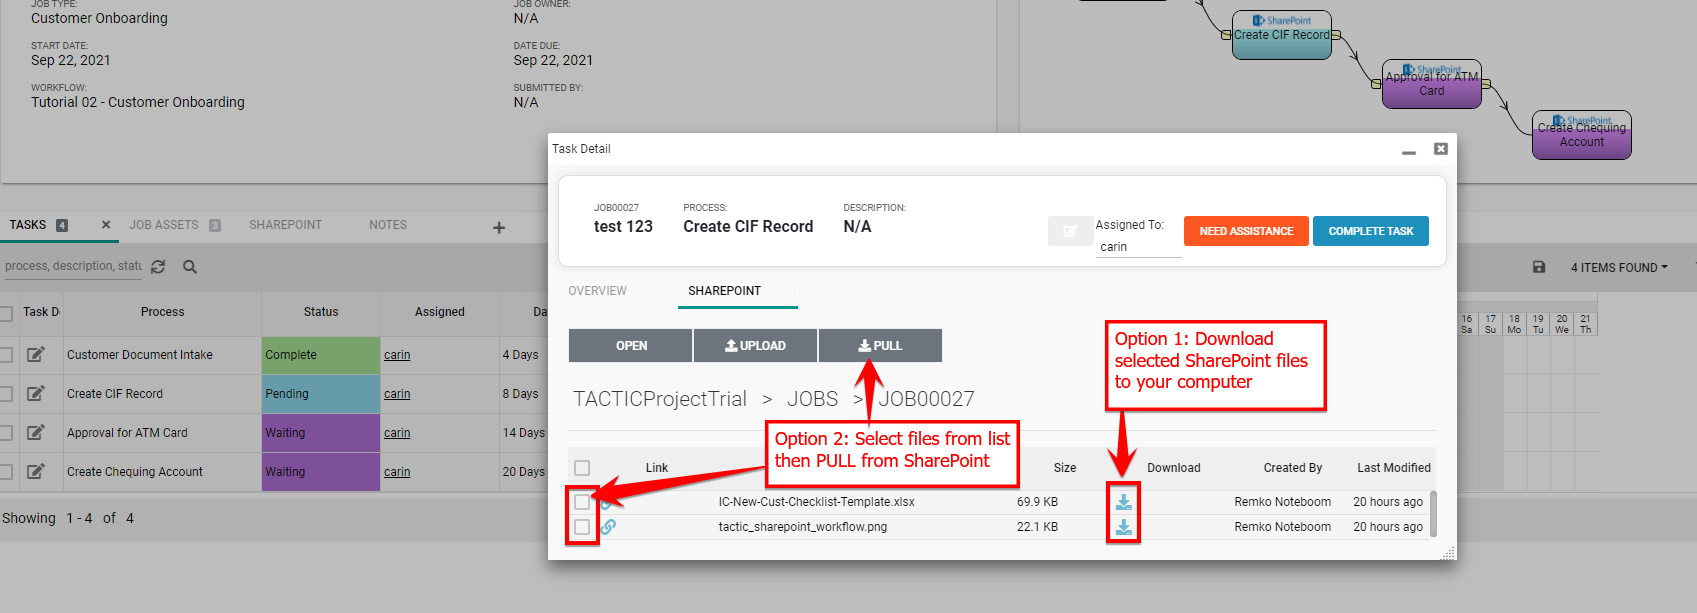
Step 7:
Return back to the JOB you created. Notice that the first task is complete and the second one is now in Pending. Open the Task Detail (paper/pen icon) on the far left of the list view. Go to the SHAREPOINT tab and select the file(s) you would like to download.
![]()
There are two methods to do download:
Option 1: Download the assets directly to your computer using the dowload icon under the DOWNLOAD column.
Option 2: Select the desired asset from the list, then press the PULL button. To access those files by going to the Job Assets tab. These files will then be stored in TACTIC within the JOB itself (WIP Asset Library) so users can work and update files as required without fear of losing track of the lastest version. Finalized assets can be uploaded to SharePoint and/or the the main TACTIC Asset Library.
TACTIC's integration with SharePoint ensures all digital assets, regardless of their repository location (SharePoint, TACTIC WIP Asset Library, TACTIC Main Asset Library) are easily searched and trackable. Your SharePoint asests can seamlessly integrate with TACTIC's Workflow Engine and your projects related to those assets can be managed with TACTIC's Project Management tools.
To learn more about TACTIC's unique DAM capabilities, please refer to our TACTIC DAM tutorial. To create a job/project using your own unique workflow, refer to our TACTIC Workflow tutorial.
Thanks for completing this tutorial !